
In this post, I’ll be sharing my experience with a common problem faced by vinyl enthusiasts: poor audio quality but not in part of the playback equipment. As someone who loves collecting and listening to vinyl records, it can be incredibly frustrating when a record has been recorded onto a digital recorder only to hear all the problems in the recording, mixing, and mastering of the source. These issues can greatly detract from the listening experience, but I’ve found that using Adobe Audition 2023, it’s possible to greatly reduce these problems and greatly improve their audio. In this post, I’ll be walking you through the steps I took to fix the audio of “The Name of the Game is Go” made for Pan American World Airways.
It’s important to note that poor audio quality on a vinyl record is not always caused by the record player itself. In fact, there are several factors that can contribute to poor audio quality, such as the condition of the record, the quality of the pressing, or even the recording itself. For example, a record that has been played frequently or stored improperly may have scratches and blemishes that can cause popping and crackling noises. A poorly pressed record may have inconsistencies in the grooves that can lead to distortion or skips. And even a well-made recording can be affected by issues such as bad mastering or faulty equipment used during the recording process, leading to poor stereo separation or distortion. Before I go into the process, listen to the original recording taken from the record.
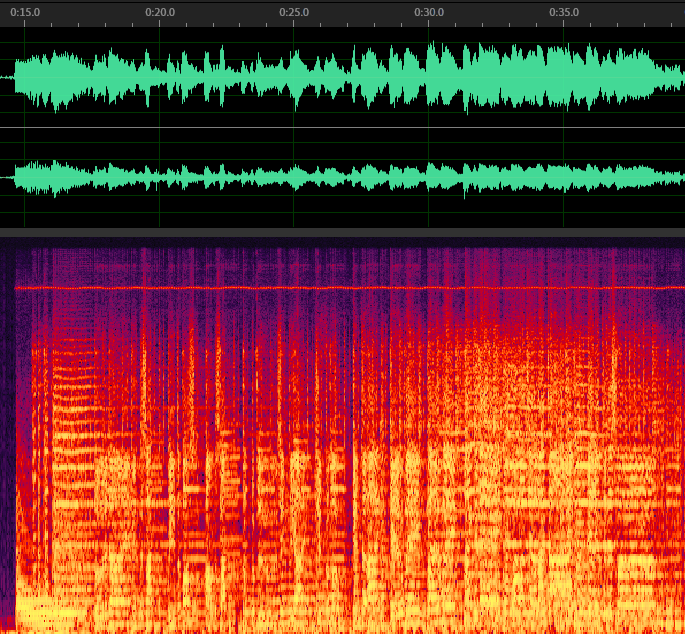
Listening to this particular vinyl record, it’s immediately noticeable that there are pops and clicks present throughout the recording. This is expected given the age of the record and unknown history of how it was stored and cared for. Listening closer to the audio also reveals a high-pitched whine that is not present on all tracks, less than optimal stereo separation, and lack of clarity and fidelity. All of which is likely caused by a manufacturing defect in the record, faulty equipment used during the recording process, or poor mastering. All off this can greatly detract from the listening experience. It’s clear that this record could benefit from some audio restoration work to improve its overall sound quality. One point I would like to make is before this recording was made, I cleaned it with an ultrasonic cleaner to remove any surface dirt and debris.
I use Adobe Audition 2023 for editing audio files and after opening this file it was quite obvious where that high-pitched whine was coming from.
There are some basic tools I use before I want to cleanup that high frequency whine. First I use the diagnostic click remover to remove any loud record pops and clicks. Next I use the click / pop eliminator noise reduction. Now I want to remove some of that background noise. Unfortunately it isn’t a hiss so I will need to create a noise profile.
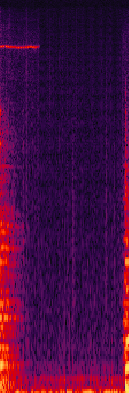
I use this section after the cut but before the next cut to create my noise profile. After it has been created, I select “Output Noise Only” and play around with the sliders to ensure I am not removing too much of the audio I wish to keep. After the noise has been reduced, I normalize the recording unchecking “Normalize All Channels Equally” so both left and right channels get normalized to peak at 98%.
To determine the frequency of the high pitch whine, I select the cut and switch to “Frequency Analysis” and click “Scan”. The range is 13,518Hz to 13,850Hz with a peak at 13,695Hz.
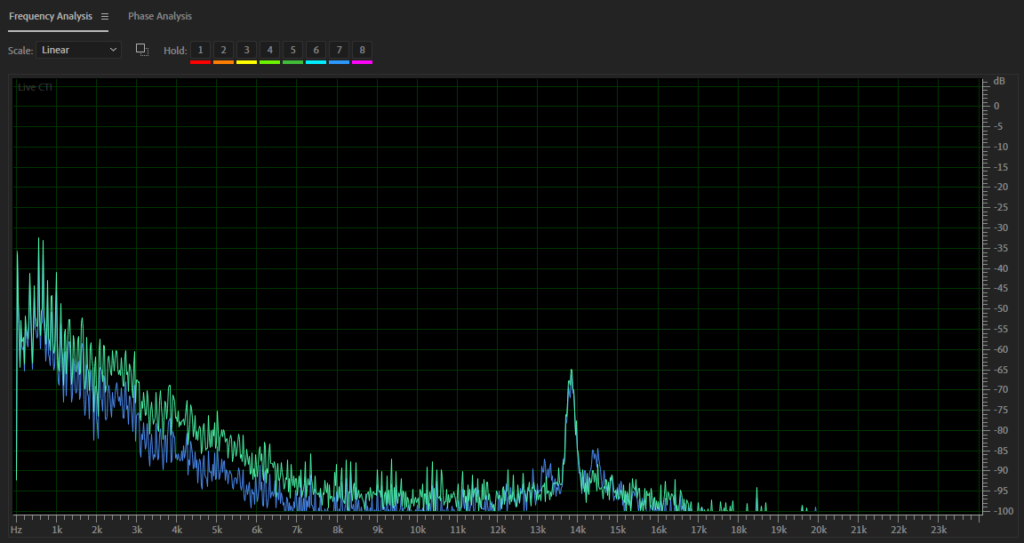
I open the Notch Filter under Filter and EQ and set the 6th band to a frequency of 13,695Hz and reduce by -96dB. The notch will be very narrow so I don’t remove too much other audio.
I switch over to the Phase Analysis window and check how off the phase and separation is of the recording.
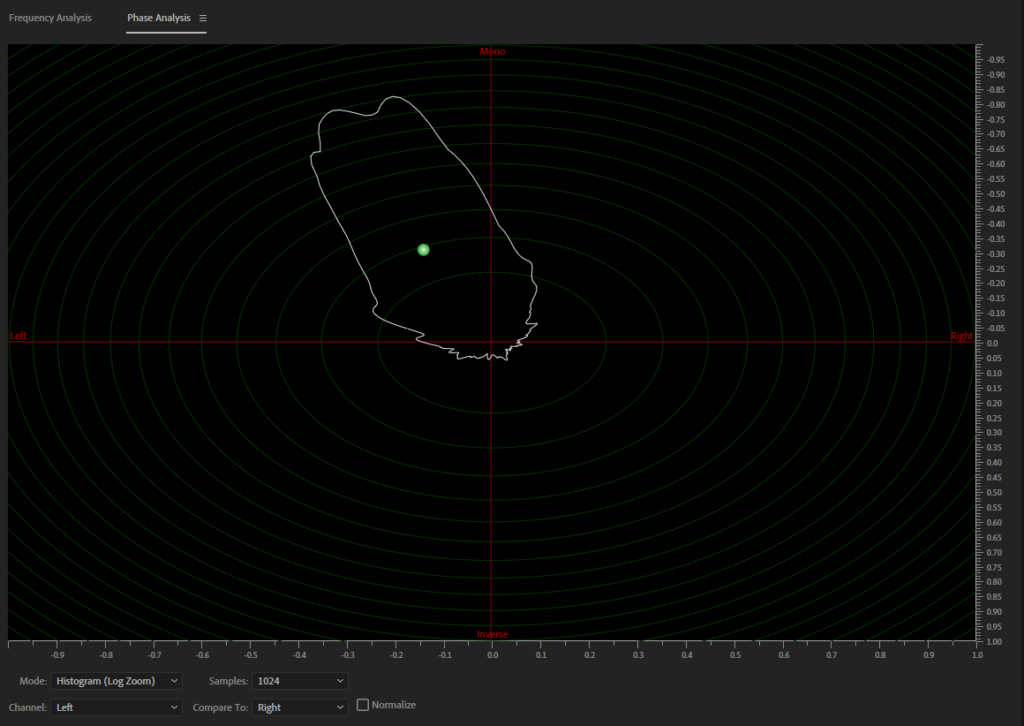
I use the automatic phase correction and then stereo expander to move it closer to center and restore the stereo separation.
Lastly a gentle lowering of the low end and boosting of the high end and this is the end result.
Of course this is very subjective. While the mechanical imperfections can be removed, other adjustments such as adjusting the stereo separation and the low and high end are more personal preference and without working from the source material it is hard to know exactly how the final product was supposed to sound.
Leave your thoughts in the comments. Did I make it sound better, worse, or no difference? Do you have any records which exhibit similar poor audio quality?
Be sure to Subscribe to my YouTube channel if you haven’t done so already where I will be sharing more unique, rare, and weird records.

[…] often marred my listening experience. In a previous post I lamented the issues experienced with the Pan Am – The Name of the Game is GO record. This wasn’t found using software or hardware, but my own ears picked up on these issues. […]